Exploring Pattern Project #2: Abstract Circles
- Cork Circles
- Washi Tape
- Glue Dots
- Cork Square
- Scissors
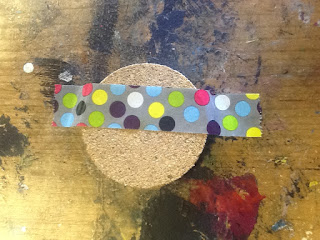
- Cover a cork circle with several strips of washi tape in varying colors & patterns. Cut strips of tape that are slightly larger than the diameter of the circle and stick them horizontally across the circle, overlapping one another slightly, until you’ve covered the circle.
Then turn the circle over and trim off the tape that extends over the edges with scissors.
Continue covering the circles in this fashion, until you have 16 of them. Make each circle unique, but also think about how they will look together.
- Arrange your circles on the cork square. You can make a simple 4 x 4 square with them, or you can do a different kind of arrangement, if you prefer. Spend some time on this and think about the rhythm of the colors and patterns as you arrange them.
When you have an arrangement you like, stick the circles to the square with a Glue Dot on the back of each circle.
- Hanging Instructions: Use Command Picture Hanging Strips to hang these on the wall. Follow the package instructions to ensure they don’t damage the wall.
Bonus Project: Abstract Circle Pins
Additional Materials
- Stick-On Jewels
- Self-Adhesive Pin Backs
- Make a pin to wear from an abstract circle. Start by making a circle as instructed in #1 above.
- Add some interest to your design by adding stick-on jewels to the circle.
- Finish by sticking a self-adhesive pin back to the back of the circle.
Bonus Idea: Make Your Own Washi Tape
Use the double-sided tape to make your own wash tape out of fabric, patterned paper, or a pattern or texture you cut out of a magazine. Simply stick one side of the tape to the back of the fabric or paper you’re using, then trim the excess paper or fabric off with scissors. Now you have a strip of tape that you can peel the back off of and stick down.


Comments
Post a Comment